Today we're launching Asset Roles — a way to label assets by what they're for, so Baseline knows exactly where to put them in your brand guides and sites.
What are roles?
A role is a semantic tag like primary-logo, heading-font, or primary-color. It answers the question "what is this asset used for?" rather than just "what type of file is this?"
Once an asset has a role, any site block configured to show that role will display it automatically. Swap the asset later — reassign the role to a new file — and every block updates instantly, with no layout changes needed.
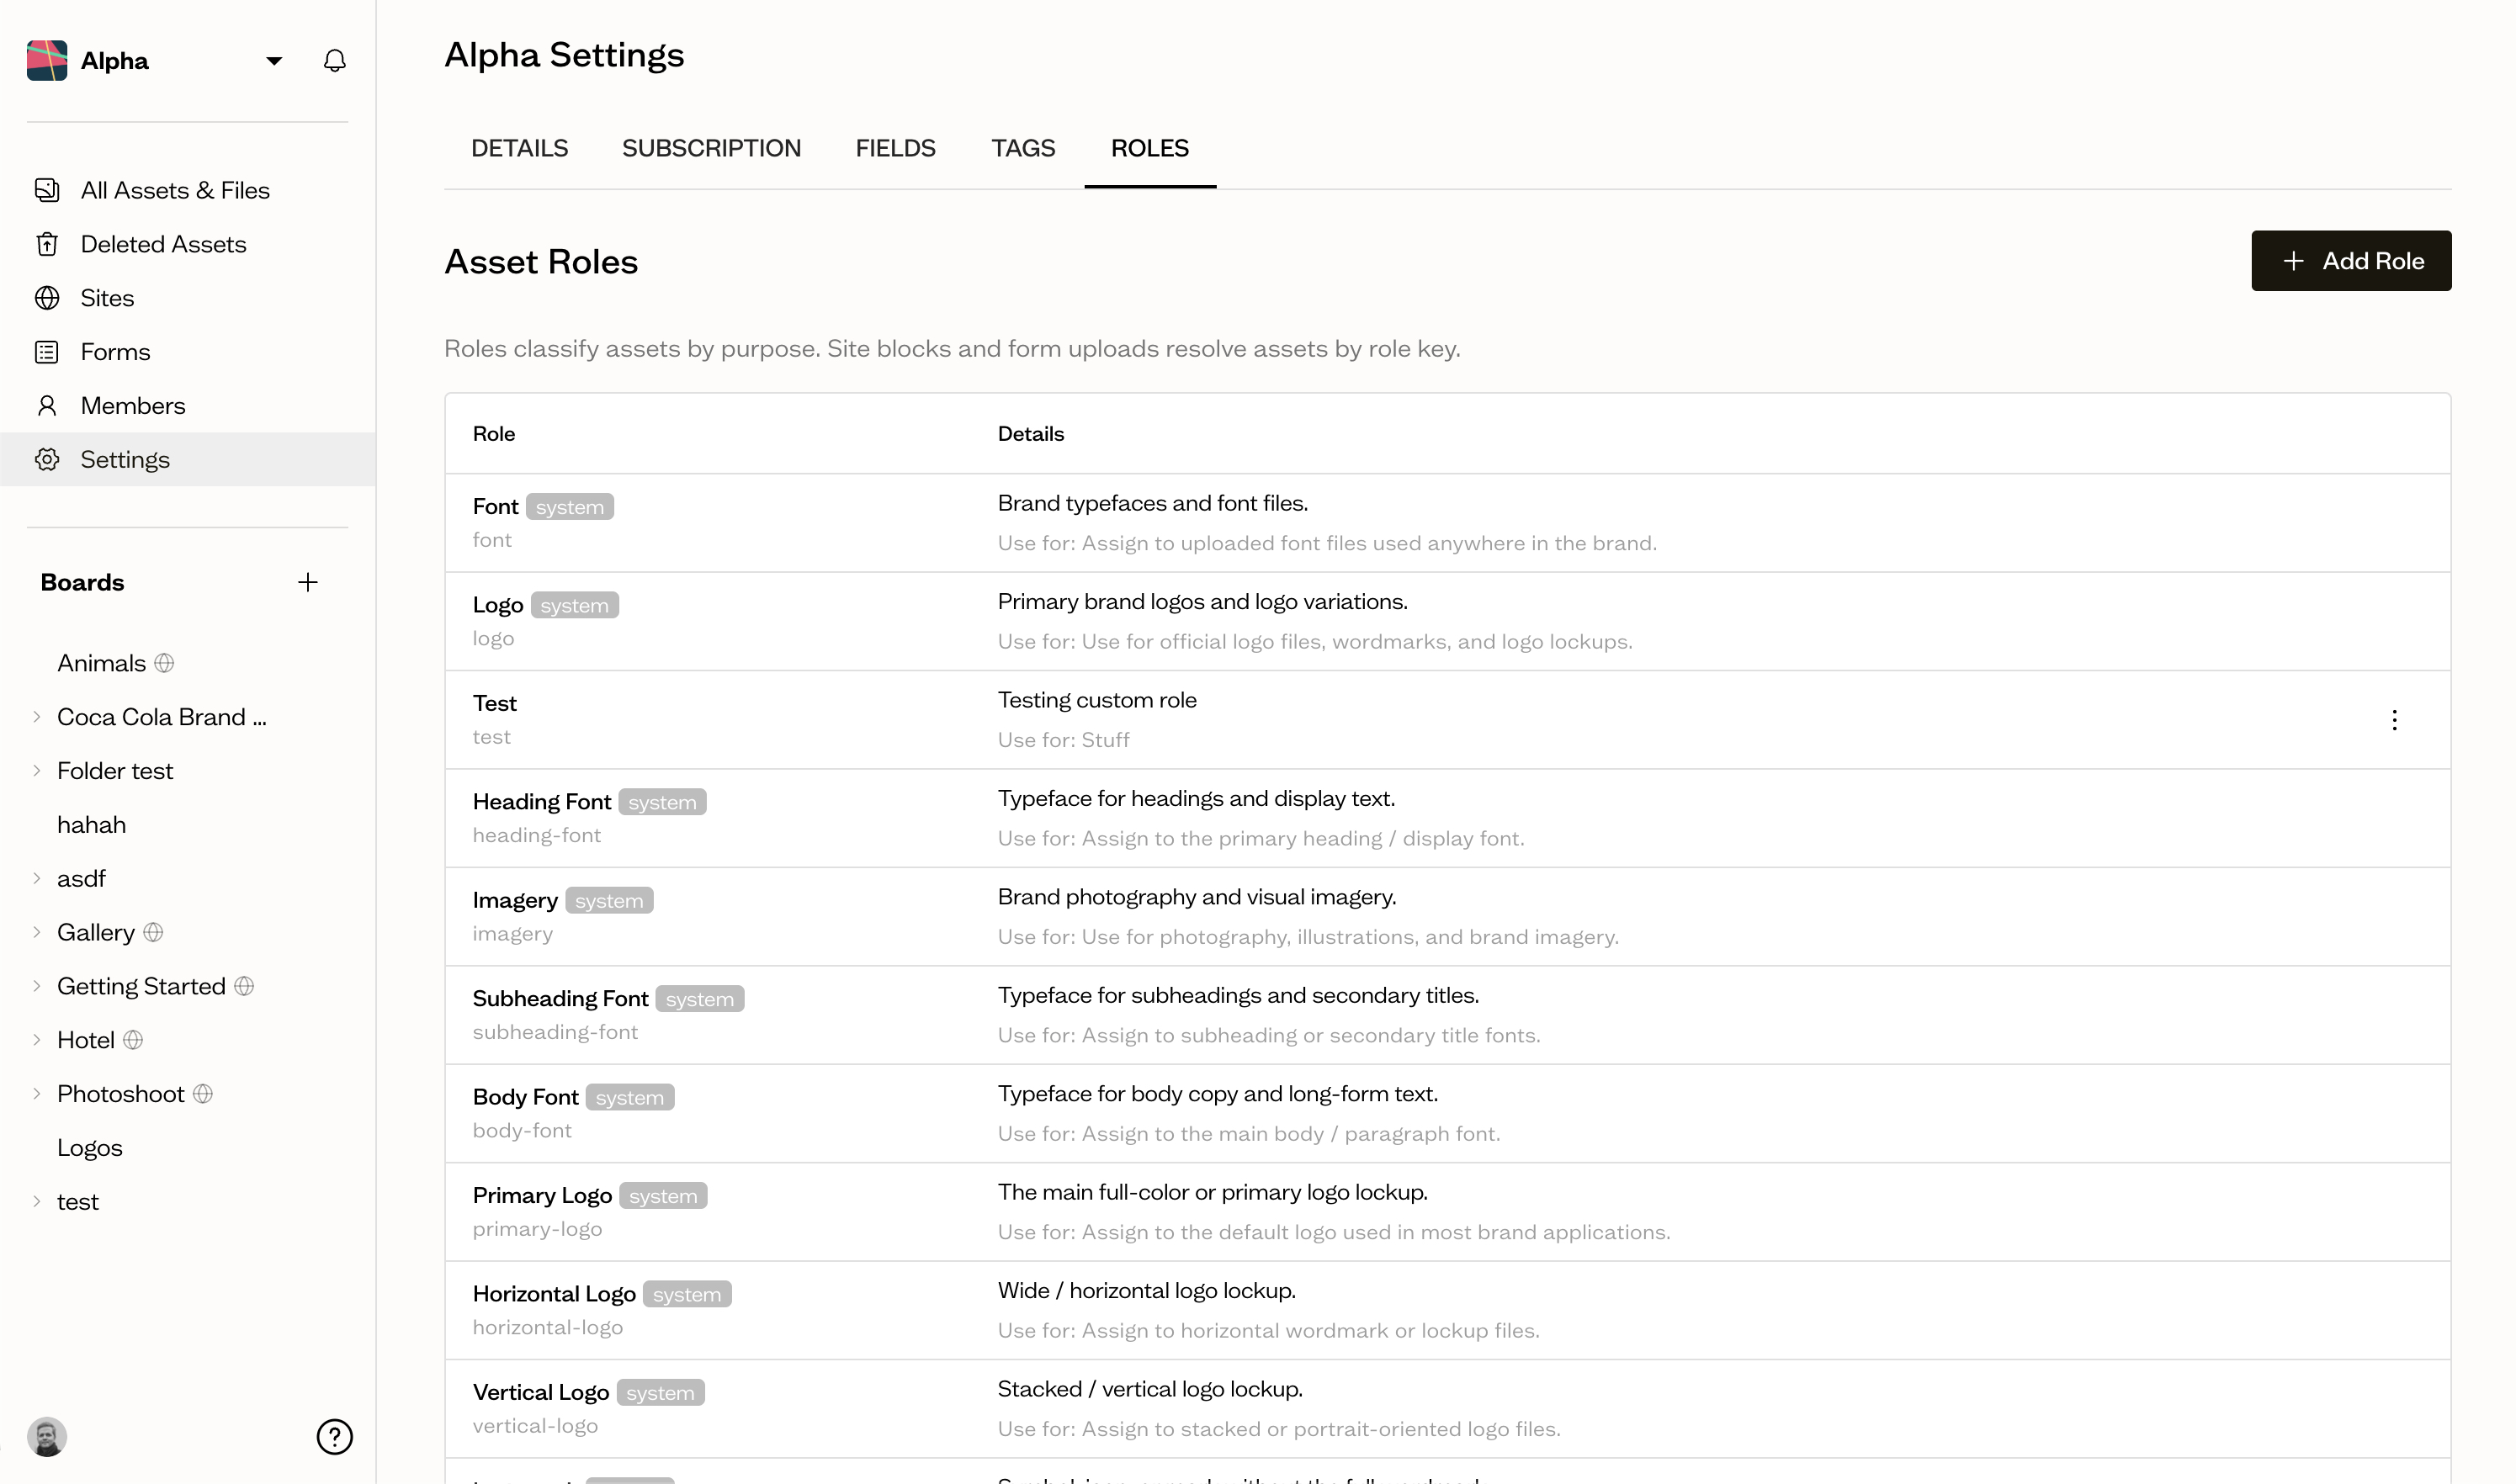
System roles
Every workspace starts with a set of built-in system roles covering the most common brand assets:
- Fonts —
font,heading-font,subheading-font,body-font - Logos —
logo,primary-logo,horizontal-logo,vertical-logo,logomark - Colors —
color,primary-color,secondary-color - Imagery —
imagery
System roles can't be renamed or deleted, but you can create as many custom roles alongside them as you need.
Custom roles
Head to Workspace settings → Roles to create your own. Each role has a:
- Name — the human-readable label, e.g.
Campaign Hero - Key — the slug used internally and in site blocks, e.g.
campaign-hero(filled in automatically as you type) - Description — what the role represents
- Usage — when to assign it
- Do not use for — edge cases to avoid
Custom roles work exactly like system roles once created: they show up in the asset detail panel, in form question settings, and in the site editor's block configuration.
Roles in forms
This is where roles become most powerful. In the form builder, you can attach roles to any file upload or color question.
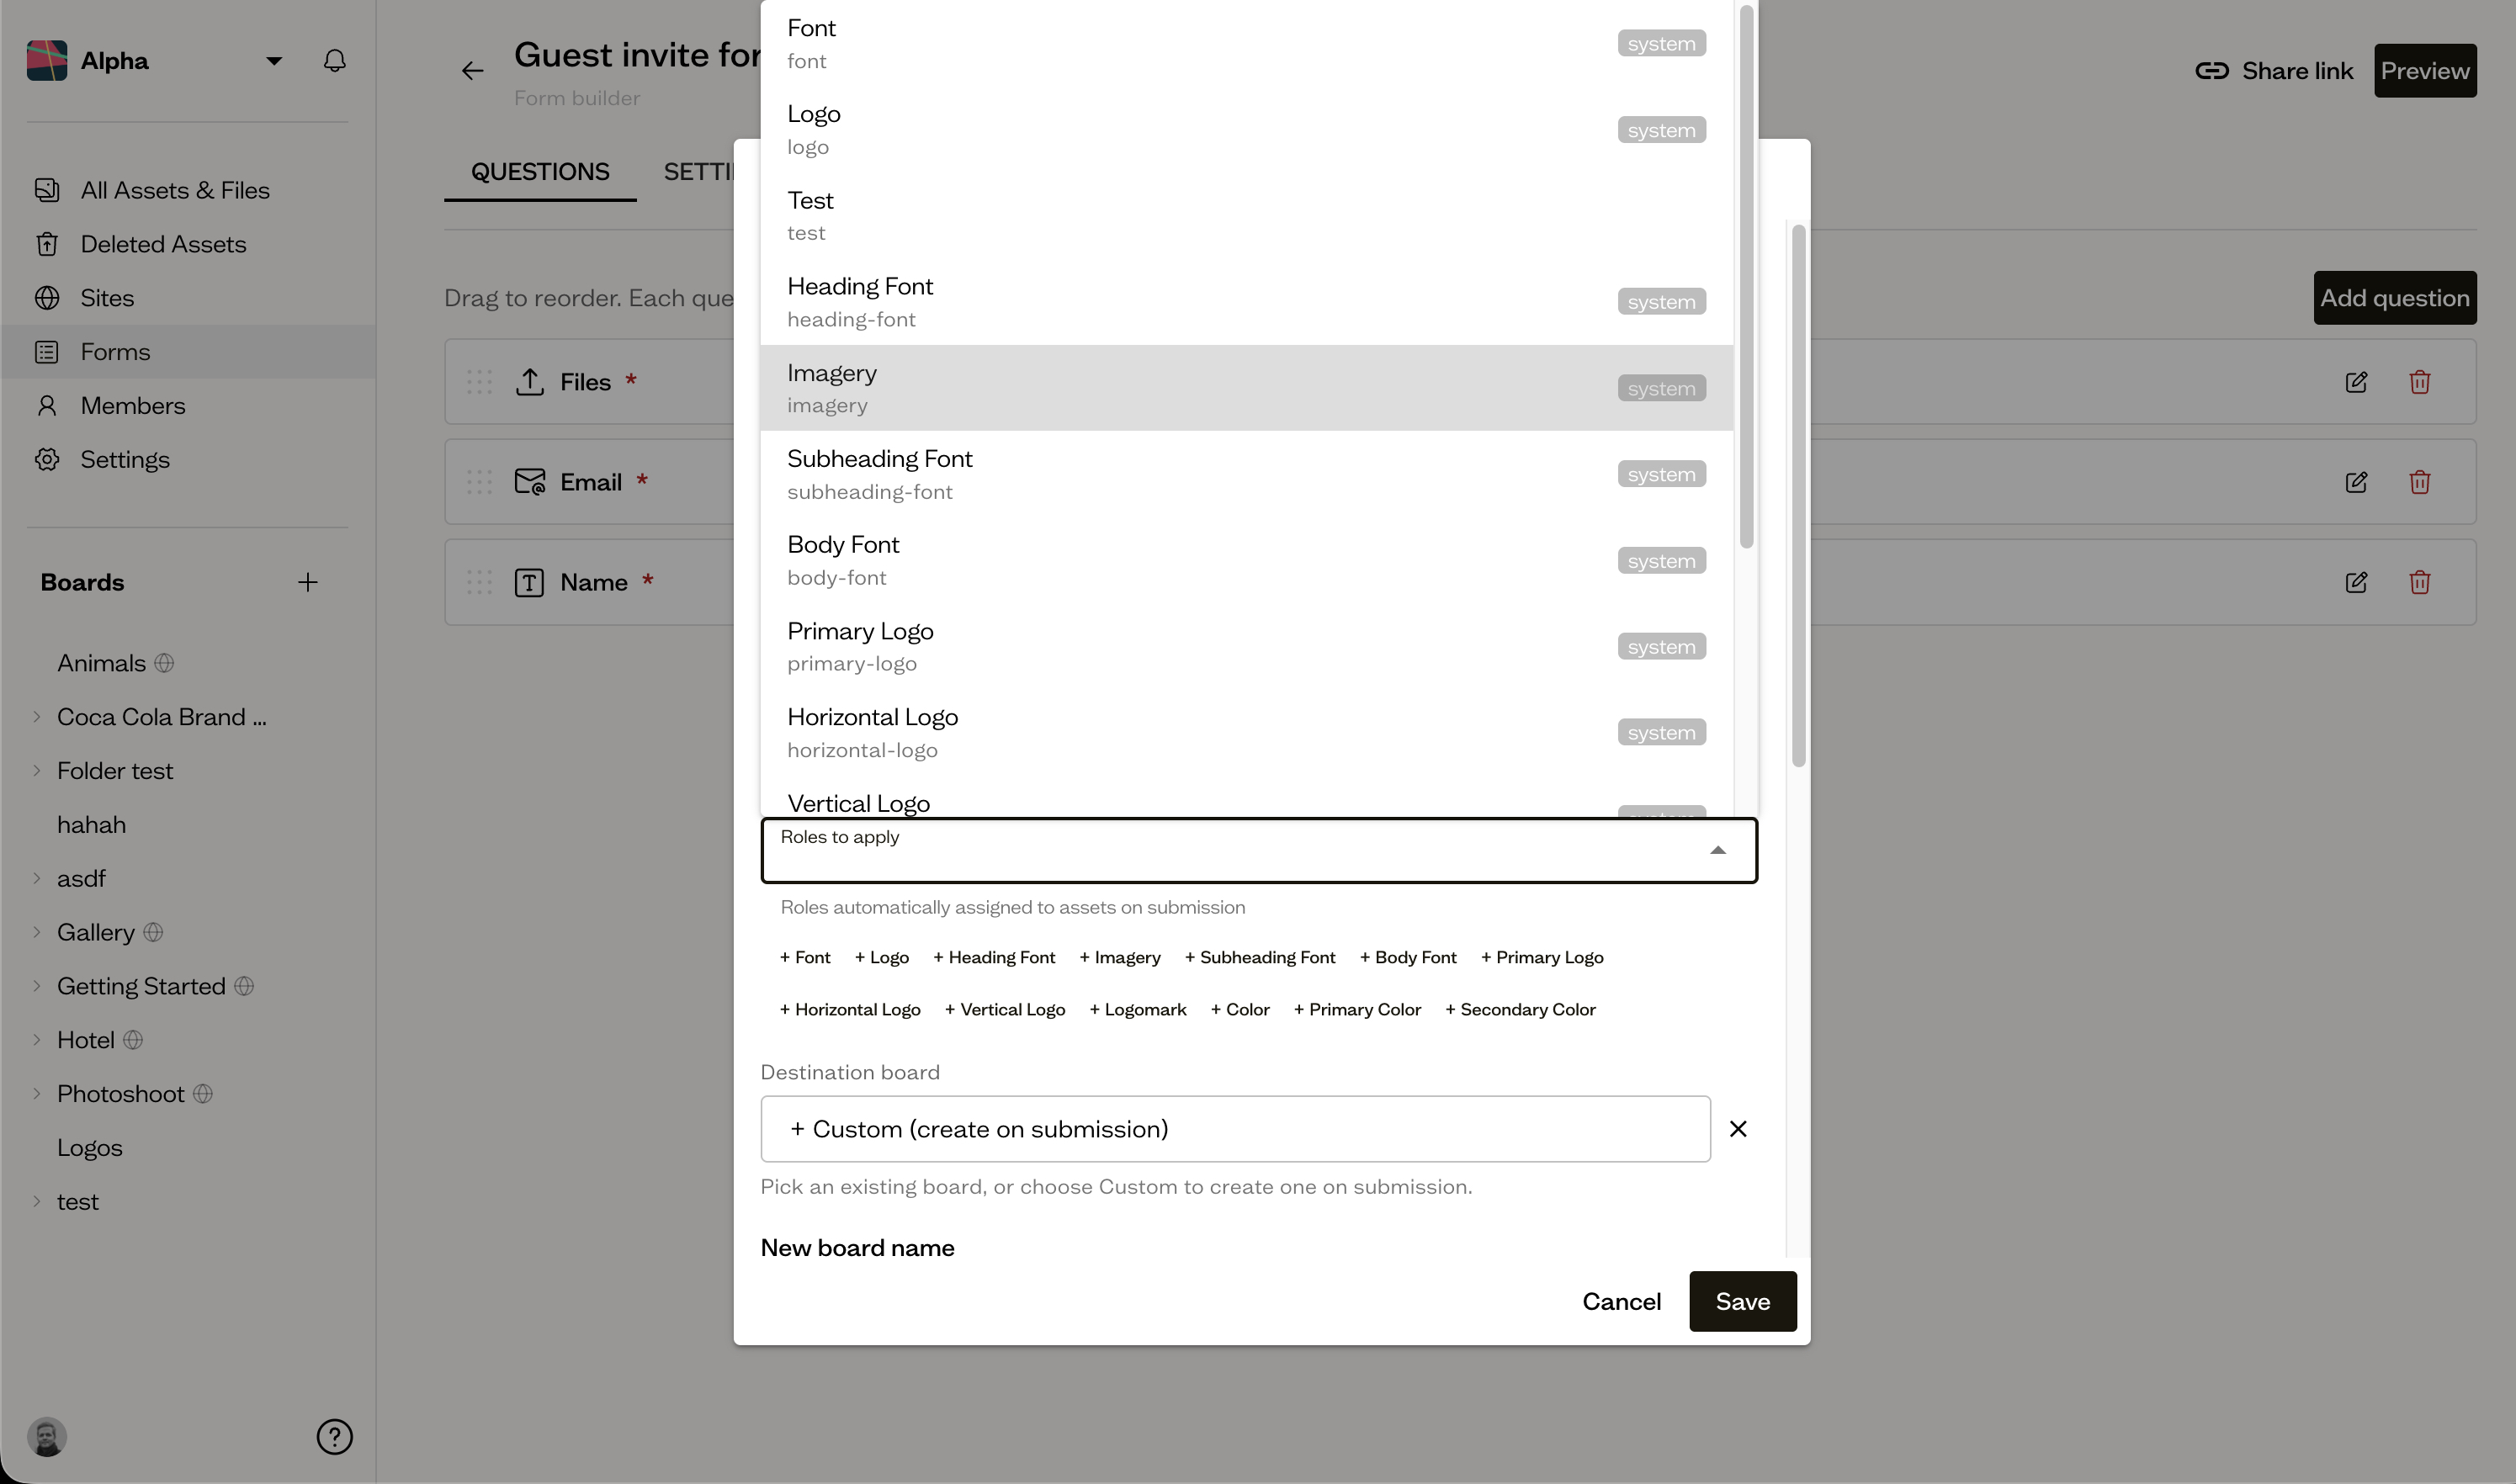
When someone submits the form, every asset they upload through that question is automatically tagged with the roles you specified. A few practical examples:
- A logo upload question tagged
primary-logo→ the submitted logo becomes the primary logo immediately - A color question with
primary-colorandsecondary-color→ the first swatch getsprimary-color, the second getssecondary-color - A font upload tagged
heading-font→ Baseline knows to use that font in heading blocks
No one has to go back and tag assets by hand after the fact.
Roles in brand guides
Site blocks can be set to pull assets by role rather than by a fixed selection. Select a block in the site editor, open its settings in the right sidebar, and choose a role from the Asset source dropdown. The block will always show whichever assets currently carry that role.
Importantly, blocks find assets by role regardless of how your boards are organized. You don't need to move files into a specific board structure anymore for a template to pick them up — as long as an asset has the right role, it will appear in the right block. Organize your boards however makes sense for your team.
When a form is submitted, the uploaded assets land in your board already tagged with the right roles. From there, click Publish on the board, select a template, and Baseline fills in every block automatically — logos, colors, and fonts are already in the right places because the blocks resolve by role. No manual wiring needed.
The full flow
Here's what that looks like end to end for a client onboarding:
- Build a form with questions for logos, brand colors, and fonts. Attach the appropriate roles to each question.
- Share the link with your client. They fill it out and hit submit — no Baseline account needed.
- Assets land in the board you configured, already tagged with roles.
- Click Publish and select a template — every block is already populated with the right logo, colors, and fonts because each block resolves assets by role.
What used to take manual dragging and tagging is now a single form submission.
Foundation for AI-powered brand management
Roles also lay the groundwork for something bigger we're working towards: a Baseline MCP server.
Without roles, your assets are just files — an AI agent looking at your workspace sees a collection of images, PDFs, and color values with no way to know which one is the primary logo or which color is the brand primary. With roles, every asset has a machine-readable label that describes its purpose, like how it should be used and how it shouldn't be used. That's exactly the kind of structured information an AI agent needs to act meaningfully on your brand library.
The MCP server will let your AI agent of choice do things like retrieve the correct logo for a given context, update brand colors, or assemble a brand guide — because roles give it the vocabulary to understand what each asset is for. Tagging your assets with roles now means your workspace will be ready when that lands.
Assigning roles manually
Roles can also be assigned directly from an asset's detail panel at any time — useful when you're tagging existing assets, correcting something applied automatically, or working with assets uploaded outside a form.
Open an asset, find the Roles field in the detail panel, and select one or more roles. Changes save immediately.
Roles are live now for all workspaces. To get started, head to Workspace settings → Roles to review your system roles and create any custom ones you need.